
When we first started the process of buying our house we had decided that we weren't going to paint the walls before we moved in. Since our house had been newly remodeled before we bought it, the walls had no nail holes and were all painted a nice neutral color. Not only is paint (and all the supplies) expensive, but it's also time consuming to paint (and Drew had final exams two days before we moved in so we didn't have a whole lot of extra time to spare!).
But... then we (and in we I mean "I") started getting a little sentimental (and practical) and realized that 1.) it's a tooooooon easier to paint bedroom walls {before} you move in, especially when you have three young children you'd have to bounce around if you wanted to paint at a later date, and 2.) this is the first time we've ever owned a home and had the ability to do WHATEVER we want with it! We'd never been able to choose paint colors and this was our chance!
So, with an awesome deal on paint at Lowes and some borrowed paint supplies we decided to go ahead and paint the bedrooms and play room before our move! We left the main living areas as is for now but those will be easier to paint at a later date if we decide we want to, and they are a neutral beige/grey color now which I really don't mind at all.
We got a good deal on the paint and borrowed supplies but that still left us with the problem of time. Drew still didn't have a whole lot of time to spare and although he and his dad did end up doing a good amount of painting, I spent many days over at the new house painting by myself (and by myself I mean alone WITH ALL THE KIDS). But, what can I say? I'm pretty determined when I get my mind set on something and I had my mind set on STRIPES in Isaiah's room. So, stripes it was! It took three days, numerous numerous interruptions, and (I admit) a little bit of yelling, but I did indeed accomplish the task of painting stripes on a wall with three children 4 and under in a house with no internet, no cable, no beds for naps, few toys, and barely any food. Shouldn't I get a medal for that or something!?!? =)
Anyways, without further ado, here is how to paint stripes on a wall!
1.) Paint the wall one of the colors of your stripes (preferably the lighter color). We painted Isaiah's whole room grey first and then added the navy blue stripes to one wall.
2.) Decide if you want horizontal or vertical stripes and measure the height or width of your wall. I wanted horizontal stripes so I measured the height of Isaiah's wall from top to bottom. (Make sure you don't count the baseboard!) Divide that number by the number of stripes you want. I wanted an odd number of stripes because I wanted the blue stripes to be on the top and bottom of the wall sort of "framing" the wall. I chose 7 because I wanted fairly thick stripes.
EXAMPLE: Our walls are 93.4 inches tall, divided by 7 = 13.3 inches. That meant that each of my stripes was going to be 13.3 inches.
3.) Draw the lines for your stripes! I googled lots of different ways to draw the lines for your stripes and did what I thought sounded the easiest and most practical (and I was really happy with how it turned out!). I started at the left hand side of the wall and used a large level/ruler to mark increments of 13.3. inches all the way down the wall. Then I used the level/ruler to rule horizontal lines straight across the wall from one end to the other.
3a.) Make sure you have a pencil with you to mark the lines!!!! I marked each and every line on Isaiah's wall with THIS tiny piece of led:

And, before you judge =) I just have to say that I DID grab a mechanical pencil before I left our apartment in preparation for drawing these lines at the new house. And I even shook it to make sure that it had extra led in it! But when I went to use it at the new house I discovered that it was broken. And in my attempts to fix it I broke all the extra pieces of led and was left with this tiny little remnant! I searched the whole house, diaper bag, and car for another pencil.... would you believe it, not even one anywhere!!!!! When I called Drew to tell him of my dilemma he suggested I just go to the store and buy one. Such a man response! But, ummm, all THREE children were napping and I was just fixin to get 1-2 hours of uninterrupted painting time! No way was I waking the kids up from that! So I made due with what I had.... and, by God's grace, it turned out in the end (my fingers were sore though... it hurts to write with a tiny piece of led!).
 |
| Wa-la! Can't really see them, but perfectly straight lines across the wall. |

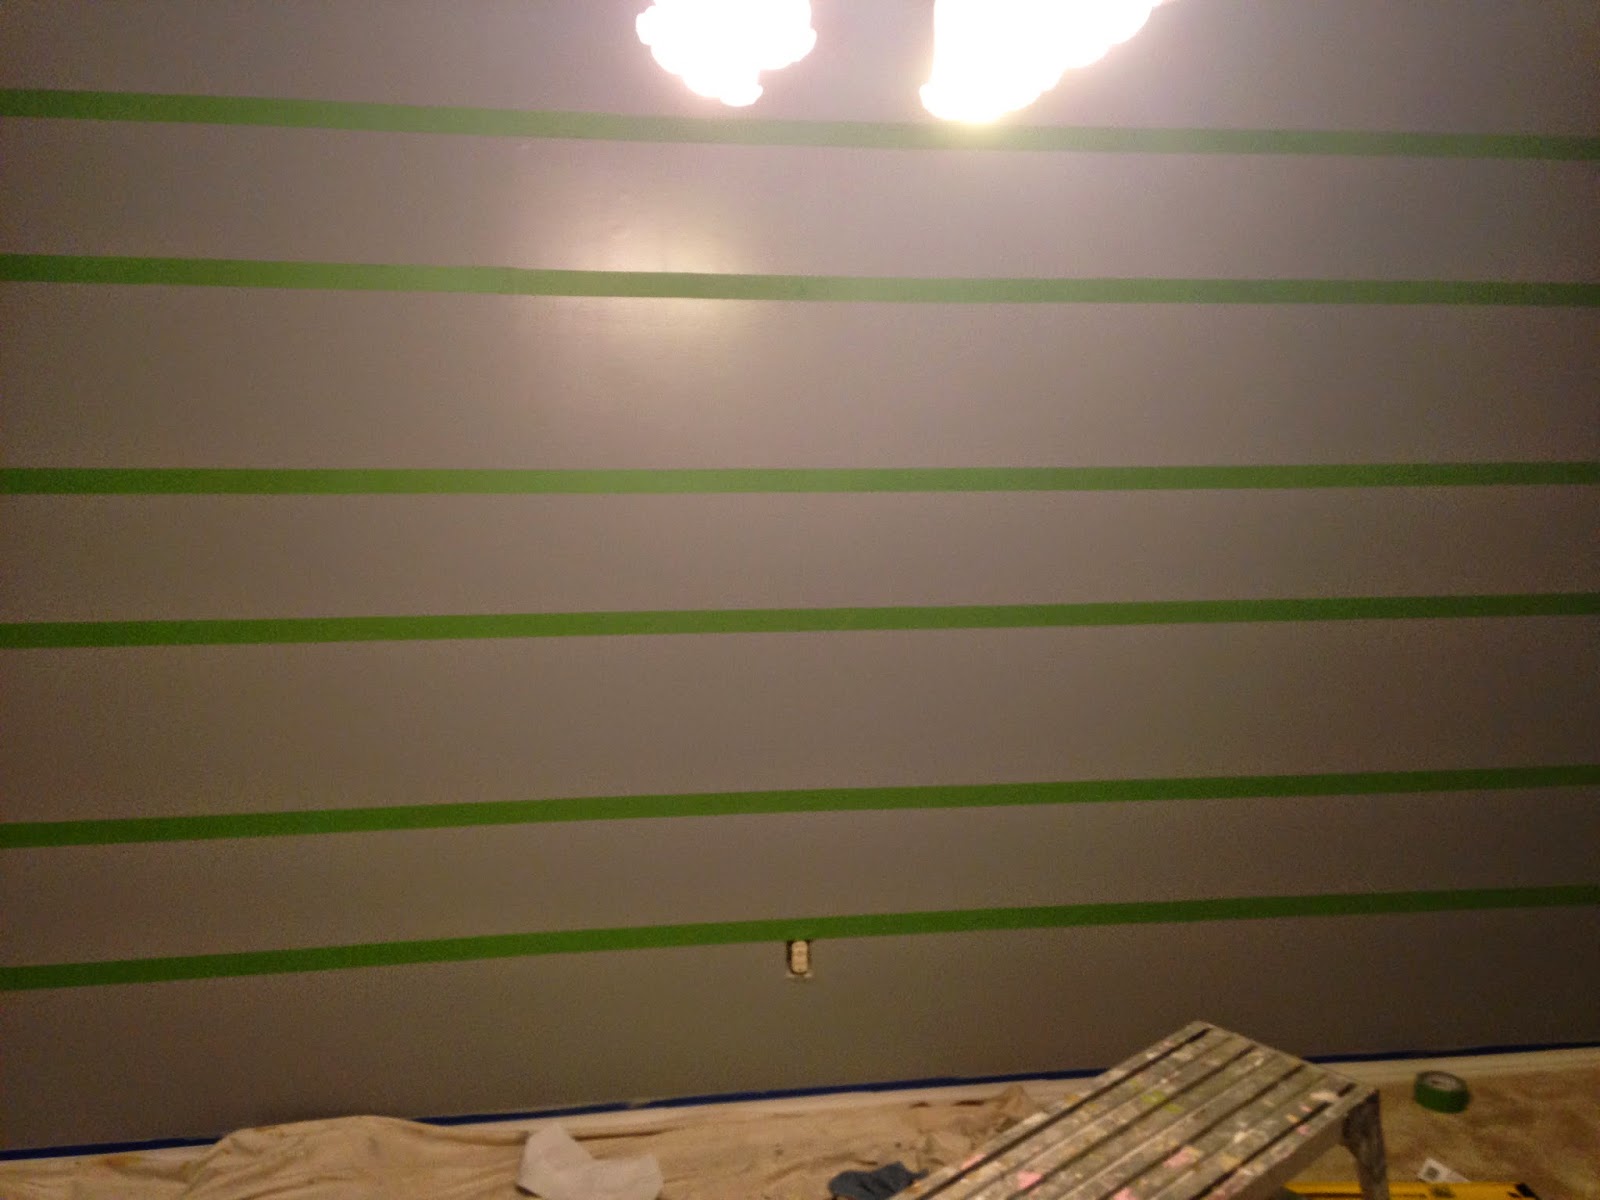
5.) Next is a very important step. {DO NOT SKIP!} It's the secret to getting perfectly crisp lines! For each stripe that you plan to paint your accent color (which for us was blue), paint over the edges of the tape that mark that stripe with your base color (which for us was grey). This seals the edges of the tape and will minimize bleeding. Let this coat dry completely before you continue.

6.) Now you can paint your fun colored stripes! The blue color that we used needed 3 coats but depending on what color or brand you use, you may be able to get away with just one. I trimmed the edges with a brush and used a small roller for the middle sections. At this point, I sent Drew (who was at work) this picture below:

To which he responded:

Oh, I do love this man who undoubtedly has the gift of encouragement!!! But, seriously, if those stripes were my finished product...... Babe, you gotta let me know the hard, honest truth. =)

There were a few spots that bled and, being the perfectionist that I am, I HAD to fix them. But it was an easy fix with just a little of the base coat paint and we were good to go!
 |
| This lighting makes Isaiah's walls look cream and blue but they are definitely grey and blue! =) |
 |
| DONE! Wahooo!!!!! |

And here's a little tour of Isaiah's room now that we've moved in. There are still so many plans I have in my head for this room including redoing the dresser and adding a huge firetruck canvas on the wall..... but we've gotta work on furniture for the rest of the house before we work on decorating his room, I guess. =)
 |
| By the way, this bed sleeps 4 people (there's a trundle underneath) so COME ON VISITORS!!!! |


So there you have it, folks... How to paint stripes on a wall. Until next time!
No comments:
Post a Comment