Monday, October 26, 2015

2015 Family Pictures

Well it's that time of year again. Time for our annual family pictures! This year the lighting was excellent, the photographer was great, our outfits came together perfectly, the setting was gorgeous.....everything was perfect. Except the kids!!

Each year I have to remind myself why I take family pictures. It's to remember how my children look and act in the current year, which is usually wild and crazy. We're not a perfect family so why should I expect my family pictures to be perfect, right!?

This year I got family pictures done to document how Olive still needs either two naps or one super long afternoon nap each day - neither of which she got that day. How this made her cranky and whiny. How her cautious personality means she doesn't often smile for strangers. And how she's at the age where she just. can't. sit. still.

I got pictures taken this year to document Eloise's cheesy smile. This girl has a beautiful smile with a mouth full of tiny, perfectly straight teeth and yet she smiled like she was an old woman trying to prevent her dentures from falling out. Are you kidding me?!?

I got these pictures taken to document that Isaiah is finally at the age where he understands how to sit still and smile a great smile for the camera. He can comprehend the reward at the end of the photo shoot (I promised mini marshmallows!) and is very motivated by the promise of rewards. He understands that when we tell him to smile he needs to smile AND look at the camera (something the other two have a hard time with). He is a sweet boy and loves to grab his sister's hand even during a photo shoot.

So, guys, this is my family as it is now. A perfectly beautiful mess. As the years go by I'm hoping (praying) that family photo shoots get easier and the kids look better but for now I'm going to treasure these photos (and maybe even laugh someday).


Of my heart. If this was the only photo I got from the shoot I think I'd be happy! <3


I think this one is probably the one that I'll blow up and hang above the fireplace...... Haha. 


We may not have it all together. But together we have it all! 

Friday, October 16, 2015

No Child is an Accident

When we got pregnant with our first child after we'd only been married 5 months, we couldn't wait to tell the exciting news to everyone! We were so happy!!! But I'll never forget what someone said when we called to tell them. Some of the first words out of their mouth were, "Was it an ACCIDENT?"

Since then I've always had a distaste in my mouth for those words. First of all, I think it's just a really rude question to ask. It's none of your business whether someone's child was planned or unplanned. If someone wants to tell you they will, if not, don't ask.

Secondly, I don't believe that there are any accidental children. Accidental parents? Yes. But no accidental children. Many moms and dads become parents unintentionally. They weren't planning to become parents or to parent another child. It happened by accident. But that child, the child that they "accidentally" created was planned by God long long ago, before the Earth was formed. God does not make children accidentally. He knew the exact moment that child would come into existence - He was not caught off guard by an "accident"!

For you created my inmost being;
you knit me together in my mother’s womb.
I praise you because I am fearfully and wonderfully made; 
your works are wonderful, 
I know that full well.
My frame was not hidden from you 
when I was made in the secret place, 
when I was woven together in the depths of the earth. 
Your eyes saw my unformed body; 
all the days ordained for me were written in your book 
before one of them came to be.

Psalm 139:13-16

Even if one of my children was not planned, I would not refer to them as an accident. Imagine how a child growing up with this label may feel. Unwanted, an accident? That's a heavy burden to carry. You could tell your unplanned child, "God planned for you to be alive on this Earth exactly when you arrived. We were surprised but HE wasn't surprised by you - He put you in our family at exactly the right time. And we are so glad that was his plan!" or something along those lines. Don't give your child the burden of being "an accident".

Which leads me to my train of thought today...... Eloise. Today is her Gotcha Day. The day we "got her" from her orphanage. The day we brought her home. The day she ceased to be an orphan and the day she gained a family. Three years ago today we brought her little 6 month old self home and showered her with love and watched her grow and thrive into the spunky 3 1/2 year old she is today.

Eloise's biological mother got pregnant with her by accident. She became an accidental mother. But Eloise is NOT an accident. God destined her to be alive on this Earth at the very time Drew and Isaiah and Olive and I are.....so that she could be a beautiful part of our family. We cannot imagine life without her. She was not planned by her mother, but she was planned by us. It's hard to forget all the hoops we had to jump through and the steps we had to complete for her adoption. All the money and the paperwork and the tears and the frustration as we went through the process! All the waiting and the praying and the hoping. It was all for her. We didn't know it at the time but God had set aside a beautiful daughter for us, planned into existence by HIM.

Sometimes people become accidental parents and chose to end the life of their child and sometimes people become accidental parents and chose to GIVE LIFE to their child whether in their own home or the home of another. We are so so grateful God decided long ago that Eloise's first mom would accidentally became pregnant with her and would give her life so that we could have a desired, planned for, and wanted daughter.

Happy Gotcha Day, Sweet Eloise. You are not an accident and we are glad you were born.

Tuesday, October 13, 2015

Update on Eloise - Botox and E-Stim

Yesterday Eloise had an appointment with her pediatric physiatrist. (In case you need to catch up, Eloise has dystonia in her right leg/foot which causes it to turn inward and gives her trouble walking. You can read more about our journey so far here, here, and here.)

Olive has been in a funk this past week and was climbing all over the furniture and exercising her new favorite word: NO! Thankfully Isaiah was in school so I only had the two girls to worry about. And thankfully Eloise has come a LONG way with doctors this past year. She used to be absolutely terrified to even step foot in the doctors office but this last year has brought about many doctors appointments for her and she has grown more comfortable.

The doctor is pleased that Eloise's foot doesn't look any worse from the last time she saw her. We don't know what has caused her condition (possibly a brain injury during or shortly after birth) and, since we don't know the cause, it's hard to know what the outcome will be. Could it get worse? Could it spread to other parts of her body? Possibly. But things are looking good so far! She is already 3 1/2 and her condition doesn't seem to be worsening or spreading. Thank you, Jesus!

However, the doctor thinks it may be time to try a few more aggressive measures. Eloise attends weekly physical therapy sessions and wears a brace but it just doesn't seem to be correcting her foot in the way her doctor was hoping it would.

Thus, Eloise has her first Botox treatment scheduled next month. The Botox will loosen the tight muscles in her leg. This will allow those tight muscles to relax a little and give us the ability to strengthen the weak muscles in physical therapy and teach them to take over where needed. The goal is to help things "even out" by hopefully strengthening the weak muscles and weakening the tight ones.  If the Botox works, it may become a regular part of our journey (maybe once every 3 or 6 months). If it doesn't seem to do anything we will look into other options.

We are also going to be doing something called electrical muscle stimulation (E-stim). We have been doing this at physical therapy but the doctor wants us to get a machine for home use and use it 3 times a week. Little sticky pads are connected to Eloise's leg and then the machine sends an electrical impulse to stimulate a muscle contraction in that muscle. This happens over and over until you disconnect the machine. When the muscle is stimulated it causes Eloise's foot to involuntarily contract and turn the correct way. Just like with exercising any muscle, this makes the muscles stronger and, over time, the hope is that it will be able to gain enough strength to turn correctly without the machine.

So, some changes coming up.... As always, we're so thankful for all the wonderful doctors and therapists that work together to help Eloise as much as possible. And, when I go to her appointments I often see children who have much more serious problems and I'm so thankful for the health that Eloise has. We have much to be grateful for!


What a gorgeous view from the 19th floor!

This girl has come a long way in learning not to fear doctors!

Tuesday, October 6, 2015

Everything Was Awesome - How to Throw a Lego Birthday Party


Alright guys, I've been working on getting all the details together of how I made everything for Isaiah's 5th birthday party last week. I've included descriptions along with links where appropriate. This was probably the most fun to plan birthday party I've done for my kids so far. And it was easy and pretty cheap since I made much of the food and decorations myself! Hope this will help you throw an awesome Lego birthday party as well!

Lego Birthday Party Invitations

There are tons of cute Lego birthday party invites available on Etsy but I was looking for something I could get for free (people just throw away the invites anyways, right!?!?). After much searching, I finally landed on these invites. I printed them on heavy card stock in full color, filled them out with the details of the party and glued them onto a slightly larger piece of colored (red, yellow, blue or green) card stock for a cute invite. I was happy with how they turned out and happy that I had all the supplies on hand to make them which made them FREE!! (I even had envelopes and stamps on hand!)

You can print these same invites here

Lego Head Marshmallow Pops


These Lego head marshmallow pops were very time consuming but not necessarily hard to make. And they turned out so cute! If you're more artistically gifted than me you could definitely make faces that better resemble actual Lego men. ;)

Here's what you'll need to make them:

  • Mini marshmallows
  • Regular marshmallows 
  • Yellow candy melts (you can buy these at Wal-Mart, Michaels, Amazon.... pretty much anywhere!) 
  • Lollipop Sticks (I bought mine at Michael's) 

Cut the mini marshmallows in half horizontally and attached them to the regular marshmallows with a drop of melted yellow candy melts. (When melting the candy melts make sure not to overheat the candy - it will become hard and unusable!)

Dip the lollipop stick in the melted candy melts and insert in to the bottom of the Lego head.

Dip the Lego heads into the candy melts and completely coat. I had to use a spoon in order to get the heads smooth with no drips.

Stick them in a piece of Styrofoam or a cookie cooler rack to dry and then add faces with the gel! Give yourself several hours (don't start at 9 at night the day before the party like me) to make these. They are very very time consuming!

To display them on party day Drew had the idea to wrap a shoebox and drill holes in the top. It worked PERFECT to keep them separated and upright!

They turned out cute AND yummy!!!

You can buy the candy melts to make these pops here


Shoe box Lego Decorations

The week before Isaiah's party I came across some awesome deals on kids shoes at Target and ended up with all these shoe-boxes I had no use for. I had them in the recycling bin for a day and then an idea dawned on me. I could make them into giant Legos and use them as decorations!! Thus inspired a super easy and cheap way to decorate for a Lego birthday party. Just buy some red, green, yellow, or blue wrapping paper (I got mine at the dollar store!) and print off these handy dandy circles that already have the Lego logo on them (best to print them on card stock if you can) and, wah-la! Cute, cheap, decorations!
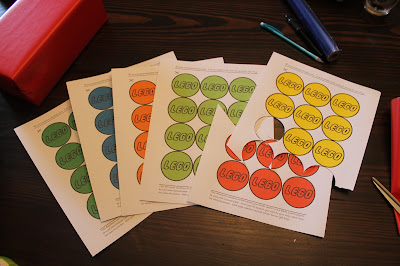


You can print these Lego circles here

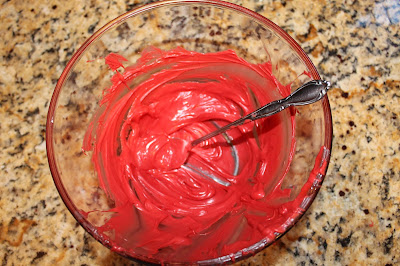
Lego Brick and Lego Men Chocolates

All you need to make your own Lego chocolates are primary colored bags of Wilton Candy Melts and Lego brick and/or Lego men molds. I bought these molds off of Amazon and was very happy with them!

Be VERY careful not to overheat the candy melts. I had a few batches overheat and become hard and lumpy and they ended up not looking so good. Spoon the melted candy melts into the molds and then {don't skip this part!} pick up and drop down the mold several times on the counter. You'll see 6 or more air bubbles come to the surface after a few bounces. This is the air that was trapped in the mold, not allowing the candy to completely fill it up. If you don't bounce it and shake it and get all the air bubbles out you will end up with chocolates that are not fully formed and have air pockets.

The candy melts only take about 15 minutes to harden up in the fridge then you can pop them out and start a new batch. I made red, green, blue, and yellow Lego bricks and Lego men over a period of several days. I set these out on the food table and also used them on top of the cupcakes on party day.

You can buy Wilton Candy Melts here
You can buy this Lego brick mold here.


Personalized Lego Happy Birthday Banner

I was so excited to find a cute, personalized Lego birthday banner on Pinterest for free! I used this free download to print the "Happy Birthday" and the Lego men. And I used this download to pick and choose the letters needed for Isaiah's name.

You can print this banner here and here
Over-sized Lego Door

Super easy and cute decoration alert!! All you need is a plastic rectangular tablecloth and some small paper plates and you can turn any door into an over-sized Lego. You could actually probably do it on a large bookcase or hutch as well. Or even just on the wall itself if you wanted!


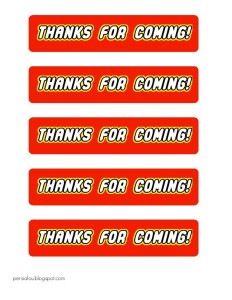
Party Favor Bag Tags

I used these cute party favor bag tags to attach to snack size ziploc bags filled with candy Legos to give to the kids as party favors. I forgot to get a picture of the completed bags, though! =(

You can print your own party favor bag tags here

I filled the bags with these Lego candy bricks (they sell smaller bags too). Not only were they yummy but they actually stack so you can play with them too! They were a big hit!


You can buy these yummy but also stack-able Lego candies here

Lego Jello Jigglers

If the thought comes into your mind to make Lego shaped jello, please just try to push it out of your mind as soon as possible. Just kidding... but seriously I'm kind of not. Lego Jello jigglers are very cute and yummy but alot of work (especially if you are using used Legos and need to wash them all very well both before and after) and a little frustrating to get out of the molds. But, here is how I did it.

Start by CLEANING all the Legos you are planning to use (or buy new). I used the kids' MegaBlocks. Then make the Jello. Make sure you follow the recipe for JELLO JIGGLERS - NOT the regular jello recipe. I made the mistake of making my first batch the regular way and it was totally not firm enough to mold into the shape of a Lego. I used red, green, yellow, and blue jello but didn't end up with very many usable red ones since that is the color in which I didn't follow the jigglers recipe.

After a few hours in the fridge I used a knife to loosen the edges and then shook them out of the Legos. Don't worry about being gentle. You'll need to use some serious force to get them out! But they come out looking just fine!


Lego Themed Party Food

I made Lego cheese and crackers, Lego ham and pb&j sandwiches, and also had red, green, yellow, and blue fruit. Get creative. There are so many things you can make to resemble Legos or Lego themed colors!! The possibilities are endless!
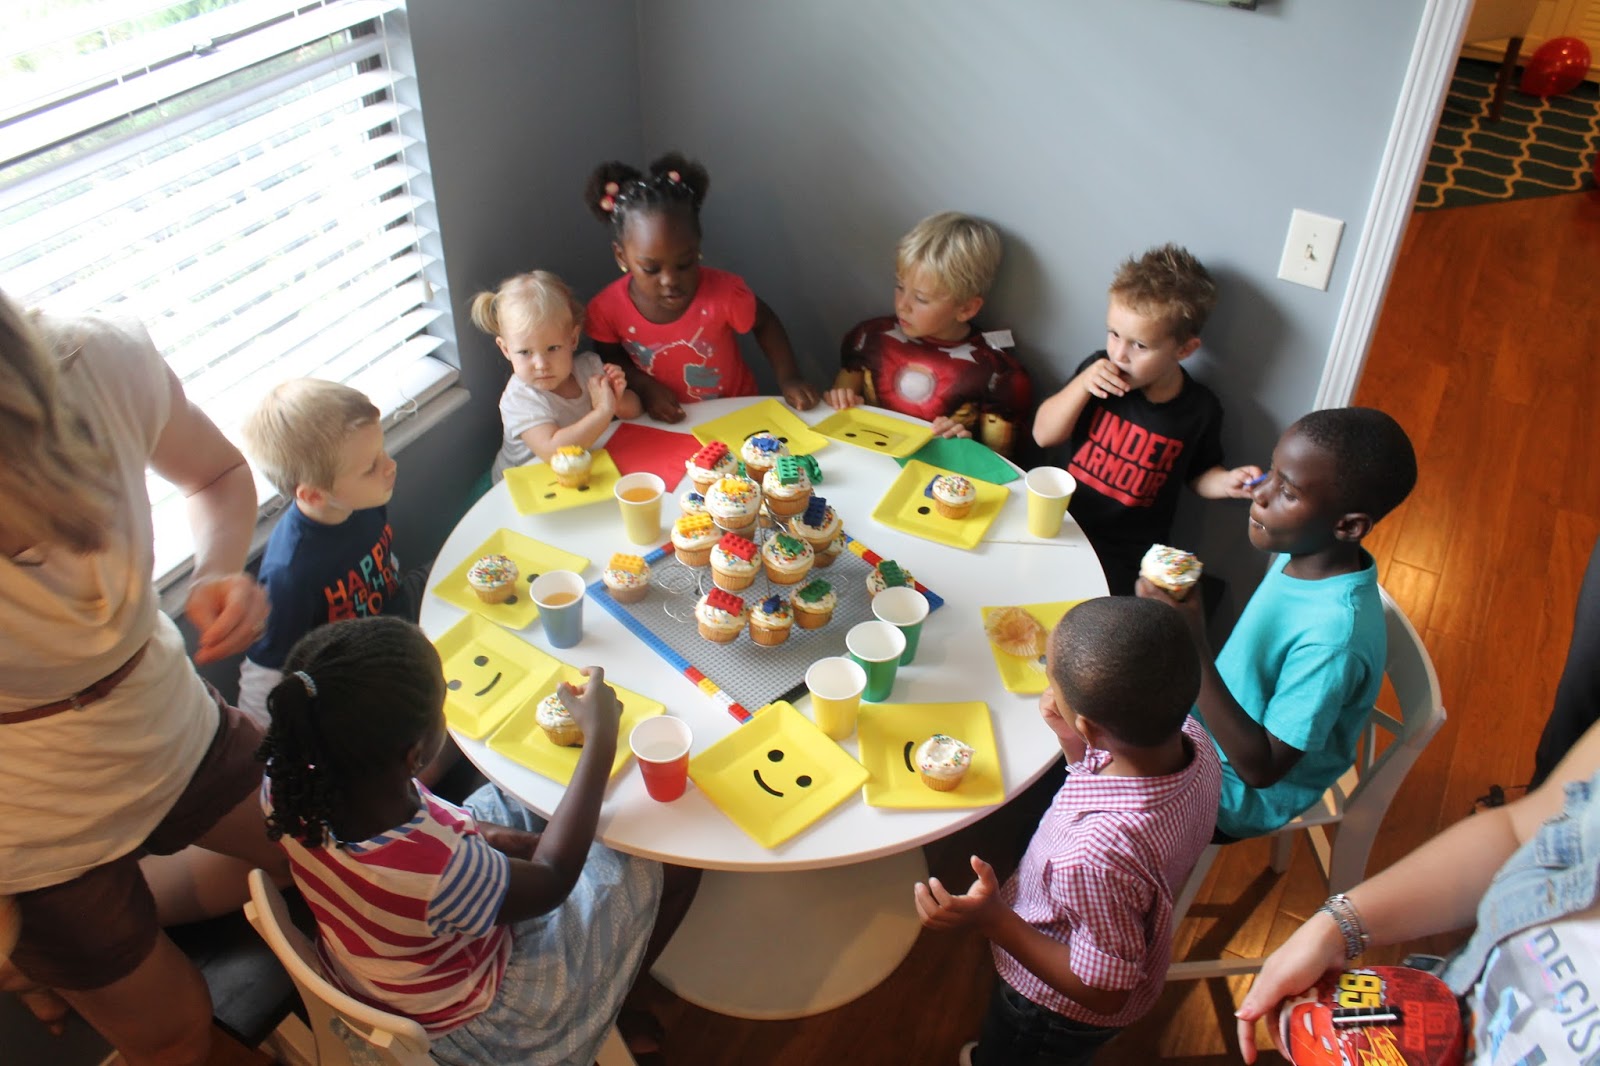


Lego Face Plates

Instead of buying fancy Lego plates I opted to buy cheap square yellow plates ($1 for a pack of 16 at the dollar store!). My plan was to draw Lego men faces on them to make Lego heads out of all of them but it turned out to be difficult to find a stencil to use to draw the faces. Since I have very little artistic ability I just ended up free handing some faces on the dessert plates and leaving the rest plain yellow. If you have more artistic ability than me you could do all sorts of different faces and expressions! I just used a non-toxic permanent marker to make the faces.


Lego Cupcakes

Every year I buy a fancy cake or fancy cupcakes for my kids for their birthday. But this year I had adorable chocolate men and Lego bricks that I had made and I decided I could easily make some super cute cupcakes on my own. Make the cupcakes with some white frosting, pour on some primary colored sprinkles and top with a Lego chocolate. Tah-dah! Awesome looking cupcakes you made yourself. (And serving them on the Lego mat from our Lego table with a border of real Legos was the perfect final touch!)


Lego Men Head Confetti

Instead of buying fancy confetti I printed out some Lego men heads on white card stock, cut them out, and sprinkled them on the tables. It looked great and was super easy and cheap! I used some of these Lego circles as confetti too. 
You can print your own confetti here and here.


Isaiah's Lego birthday party was a ton of fun to do and I think this smile says it all. He enjoyed it too. =) 


Related Posts Plugin for WordPress, Blogger...