Wednesday, March 4, 2015

A Smiling Sea Lion and Two Jenny Dogs - Our Trip to Orlando!


Last weekend we took a mini vacation to Orlando and went to IKEA and SeaWorld. The kids had a blast (mostly at SeaWorld, not at IKEA because Eloise was too short to go in the kid's play area so we didn't let Isaiah go either). We are glad that we decided to go with the season tickets (again, to SeaWorld, not IKEA =) so that we can go back again for more fun!

Most of our pictures are from our second day in the park as we spent half of the first day at IKEA and also it rained most of the first day.

Can't go to Orlando without a trip to IKEA!
If you know Isaiah you know how much he LOVES his Jenny Dog. Jenny Dog goes with him anywhere and everywhere (along with his blanket "boo"). Well, at IKEA we found another Jenny Dog and Isaiah wouldn't leave the store without it! So, now we have "old" Jenny Dog and "new" Jenny Dog and they BOTH have to go everywhere with him!
Sweet girls. 
Isaiah loved this coaster and rode it several times. We tried our hardest to squeeze Eloise past the height checker and get her on, but they caught us! Her hair brushed the top of the measuring pole but they were sticklers and wouldn't let her on. She balled!! =( 
We had a plastic bag over Eloise's cast to keep the rain out. Surprisingly it stayed pretty dry, even though she jumped in a few puddles! 


Sweet girl napping in the park. 
We saw three amazing shows! This is Shamu, the killer whale. 
My two little loves!

Brave boy!


And, I'll leave you with something that is bound to make you smile. This sea lion was cracking everyone up trying to get people to feed her by smiling this cheesy smile!!! Then after she got fed she would do more cheesy smiles! It was hilarious. I got this photo after Isaiah threw her a fish. We couldn't stop laughing about it. Can't wait to back to SeaWorld and see her again! =)


Don't tell me you can look at that and not smile. =) =)

Wednesday, February 18, 2015

Our New Normal

When Eloise first learned to walk we noticed that her feet turned in slightly. We kept an eye on it and when we got back to the U.S. I mentioned it to her pediatrician. Her pediatrician thought it was just normal in-toeing and we monitored it for several months. As time when by, her left foot seemed to correct itself but her right foot just kept getting worse. Just before she turned 2 we began suspecting that it was more than just in-toeing. She could walk and run but was slower than she should be and tripped often over her foot. Her right foot noticeably turned in as she walked. I requested a visit with a pediatric orthopedic specialist.

By the time we could get in for an appointment it was July of 2014 and Drew had already moved down to Florida while the kids and I were still in Michigan. So..... that left me to bring all three kids (Olive was barely 3 months old) to see the  specialist. It was an appointment to remember, that's for sure...

At that appointment I found out that Eloise most likely has either Cerebral Palsy or a muscle disorder called Dystonia. The Doctor talked about treatment options such as casting, botox, a leg brace, and physical therapy. But, since we knew we were moving to Florida soon, we didn't set up any follow up appointments.

Fast forward to today where I was finally able to get Eloise in to the specialist she needed to see here in Florida. We moved to Jacksonville 6 months ago but we are just now being able to get her treatment. It took us a while to get her Florida insurance, and then to get her a primary care physician and then to get her referred to a specialist who then referred her for serial casting. But the referral for serial casting got lost and, well, long story short, I've been trying for the last 6 weeks to get her an appointment... to no avail. Thankfully, Drew's dad works at the hospital and he was able to help us figure out what was going on and help us get things moving. (As a side note, way to go West Michigan for incredible speed, customer service, and organization in regard to heath care! You have got Jacksonville beat by leaps and bounds!). After months of waiting, I called the hospital yesterday and they had finally received her referral and BOOM! appointment the next day. Praise the Lord!

Eloise's appointment went well. Drew's cousin, Frannie, graciously came with me at the last minute to help me with the kids. Life saver!! Eloise does not do well with doctors but with some cookies and a movie on my phone I was able to convince her to stay still long enough to get the cast on. The type of cast she has on is called a serial cast. It is softer than a regular cast and it only stays on for five days. At the end of the 5th day we take it off at home, she is cast free the 6th day, and then we return to the doctor on the 7th day for another cast. She will get a total of 6-8 casts, each one flexing her foot slightly more to help her obtain better range and learn to walk the correct way. After the cast comes off she will need to wear a brace for several months and have 6-8 weekly physical therapy visits to help stretch out her muscles and prevent them from relapsing. If you're keeping track, that's about 4 months of weekly doctors visits I have scheduled in my planner..... not the most fun thing when you have three little ones in tow!! We also may have to repeat the casting in 6-12 months, depending on how things go. We've got a long road ahead but we are thankful for modern medicine and doctors who can help our sweet Eloise walk a little better!

On our way home from the Doctor's office!

As of right now we are uncertain if she has Cerebral Palsy or Dystonia (or possibly something else). Both disorders are most likely the result of a brain injury while either in the womb, during birth, or shortly after birth...all times before she was in our care. She is normal or ahead of schedule in all other areas mentally and developmentally. Her sole issue right now is with her right leg and foot. We have an appointment with a neurologist in two weeks to run some tests and do some scans to see if we can get to the root of the problem. When we find out more about what is causing the issue I will share more information about what the future holds.

Recovering with a movie on the couch. =)

We got the cast put on this morning and so far Eloise hasn't been complaining. They gave her a cast shoe to use which helps her walk better. We'll see how she does at night. We are suspecting that it may get a little uncomfortable for her, especially in the coming weeks when her foot is stretched to more uncomfortable positions for her. One positive thing is that she can decorate and color her cast however she pleases. And each week she will get a new cast to design a new way.... great news for a girl who loves to color! Please keep her in your prayers as you think about it! Eloise is very scared of doctors and the whole process is hard for her! Thank you!

It took her a little while to learn how to walk on it but she's doing great now!

Monday, February 2, 2015

Miss Olive: 10 Months

TEN MONTHS!?!? No way!! I'm not going to write it!! No way can my baby be 10 months already! 

I'm trying to savor all of Olive's baby sweetness as this baby becomes more and more of a toddler every day! Olive is such a joy and delight and we feel so honored that God chose us to be her family.


Here's Olive enjoying one of Isaiah's old toys from when he was a baby. Isaiah never took as much interest in it as she does. Livy loves it!

Height & Weight: Olive is 20.2 pounds and TALL!

Eating: Loving Mama's milk and nursing several times a day. Eating all table food. We try to sneak in some babyfood every now and then since we have a cupboard full but she pretty much always refuses it in lieu of something that tastes better. Smarty pants!

Did I mention that she likes food?

This girl loves her blankie! 
Love me a baby in just a diaper. <3
Sleep: Finally, we have some structure going on around here and Olive is sleeping an average of 11-12 hours straight through the night!! Occasionally she will wake up around 5 and want to nurse but often times sleeps straight through to 7 am. Halleluiah!  

Olive has pretty much slept in a pack n play since she was born because of all the moving around that we did! We finally got her crib set up this month and this is her on the baby monitor taking her first nap in it. It took her a while to fall asleep but now she sleeps great in her big girl room!
Personality: Livy is a busy girl! Always getting into something these days. She loves to laugh and play peek-a-boo type games with people. She is a snuggler and loves to lay her face on your chest. She continues to be a sweet sweet baby and we're all smitten. =) All of us, even Zai and Ellie, love having a little baby in the house!

Always. In. To. Everything.

Miss Troublemaker!
Milestones: So.... We thought for sure Olive would be walking by 9 months. Guys, she is so so so so close. She gets up to a standing position from the floor without holding on to anything! She can walk a step or two. But then she doubts herself and gracefully drops down and goes back to crawling. She'll walk from one piece of furniture to the next if she knows she can make it but she just doesn't have confidence to full out walk yet!

She has been learning lots of sign language this month- all done, more, please. Also she learned to raise her hands when we say, "How big are you? SO big!" She knows my name now and crawls around the house shouting "MAMA! MOM! MAMA!" when she can't find me.

She waves "hi" and "bye-bye" and can say, "uh-oh." She has 8 teeth, wears size 3 diaper, and size 9-12 or 12 month clothes.


Family walk to the park!
Isaiah and Eloise: I can't tell you the number of times that Isaiah says to me, "Awww Mom, Baby Olive is so cute." =) And the number of times Eloise grabs and hugs and kisses her. They both love her so much (except when she's getting into something they're doing or building or eating....). But for the most part they all get along well and I'm grateful!

Olive has started copying the things Eloise and Isaiah say and do. You can see the wheels in her little head spinning as she takes in all that they do and then tries to do it herself. Thankfully she has some good roll models to look up to as she grows up!

This picture cracks me up. Olive thinks it's all about her! Eloise is like, "not another picture..." and Isaiah is thinking, "Mom, I'm smiling, let's get this over with."
This girl's a climber!!
The kids love their playset from Grandpa!!
HAPPY TEN MONTHS, BABY GIRL!

Thursday, January 29, 2015

Quadruple Chocolate Soft Fudgy Pudding Cookies


STOP what you are doing and go and buy the ingredients to make these cookies right now!!! (Except if you are on a diet then DO NOT make these cookie..... they will ruin you for sure!)

Seriously, these cookies are a little taste of (chocolate) heaven on earth! Four different types of  chocolate in them and a cookie that bakes up bakery style soft and fluffy! I have made these cookies several times and they never last long!

I took the pictures for this post several months ago when we were still living at our apartment...but then life got busy and I didn't get around to posting them. But today, I am determined to get this post out because the world needs to learn about these cookies!!!!! Enjoy!

QUADRUPLE CHOCOLATE SOFT FUDGY PUDDING COOKIES

Yield: about 17 med/large cookies
Prep Time: 15 minutes
Cook Time: about 10 minutes
Total Time: 3+ hours, for dough chilling
INGREDIENTS:
3/4 cup unsalted butter, softened (1 1/2 sticks)
3/4 cup light brown sugar, packed
1/4 cup granulated sugar
2 large eggs
2 teaspoons vanilla extract
1 packet instant chocolate pudding mix, about 3.7 to 3.9 ounces (not sugar-free and not 'cook & serve')
1/4 cup unsweetened natural cocoa powder
2 cups all-purpose flour
1 teaspoon baking soda
pinch salt, optional and to taste
1 cup semi-sweet chocolate chips
5 ounces dark chocolate, chopped (I used a Ghiradelli 60% cocao Bar)
DIRECTIONS:
1.      Combine the butter, sugars, egg, vanilla, and beat on medium-high speed until creamed and well combined, about 4 minutes.
*My pictures reflect a double batch! (These cookies are too good for just a single batch)*
Step 1a. Get a cute little helper to help you mix!
2.      Stop, scrape down the sides of the bowl, and add the pudding mix, cocoa, and beat on low speed until just combined, about 1 minute.


3.      Stop, scrape down the sides of the bowl, and add the flour, baking soda, optional salt, and beat on low speed until just combined, about 1 minute.

4.      Stop, scrape down the sides of the bowl, and add the chocolate chips, chopped chocolate, and beat on low speed until just combined, about 30 seconds.


5.      Using a large cookie scoop or your hands form approximately 17 equal-sized mounds of dough. Roll into balls, and flatten slightly.
6.      Place mounds on a large plate or tray, cover with plasticwrap, and refrigerate for at least 2 hours, up to 5 days. Do not bake with unchilled dough because cookies will bake thinner, flatter, and be more prone to spreading.
* Note: I don't quite follow the directions at this point. I do chill the dough, but I chill it all in the bowl instead of rolling it into balls first and then trying to find trays or containers large enough for them all to sit in while in the fridge. Ain't nobody got time for that! And my cookies still turn out great! *
7.      Preheat oven to 350F,  spray a baking sheet with cooking spray. Place dough mounds on baking sheet, spaced at least 2 inches apart and bake for about 10 minutes. Don't overbake which is easy to do with dark cookies. Cookies firm up as they cool. Allow cookies to cool on baking sheet for about 10 minutes before serving.

8.      Cookies will keep airtight at room temperature for up to 1 week or in the freezer for up to 6 months. Alternatively, unbaked cookie dough can be stored in an airtight container in the refrigerator for up to 5 days, so consider baking only as many cookies as desired and save the remaining dough to be baked in the future when desired.

Thursday, January 22, 2015

How to Paint Stripes on a Wall

When we first started the process of buying our house we had decided that we weren't going to paint the walls before we moved in. Since our house had been newly remodeled before we bought it, the walls had no nail holes and were all painted a nice neutral color. Not only is paint (and all the supplies) expensive, but it's also time consuming to paint (and Drew had final exams two days before we moved in so we didn't have a whole lot of extra time to spare!).

But... then we (and in we I mean "I") started getting a little sentimental (and practical) and realized that 1.) it's a tooooooon easier to paint bedroom walls {before} you move in, especially when you have three young children you'd have to bounce around if you wanted to paint at a later date, and 2.) this is the first time we've ever owned a home and had the ability to do WHATEVER we want with it! We'd never been able to choose paint colors and this was our chance!

So, with an awesome deal on paint at Lowes and some borrowed paint supplies we decided to go ahead and paint the bedrooms and play room before our move! We left the main living areas as is for now but those will be easier to paint at a later date if we decide we want to, and they are a neutral beige/grey color now which I really don't mind at all. 

We got a good deal on the paint and borrowed supplies but that still left us with the problem of time. Drew still didn't have a whole lot of time to spare and although he and his dad did end up doing a good amount of painting, I spent many days over at the new house painting by myself (and by myself I mean alone WITH ALL THE KIDS). But, what can I say? I'm pretty determined when I get my mind set on something and I had my mind set on STRIPES in Isaiah's room. So, stripes it was! It took three days, numerous numerous interruptions, and (I admit) a little bit of yelling, but I did indeed accomplish the task of painting stripes on a wall with three children 4 and under in a house with no internet, no cable, no beds for naps, few toys, and barely any food. Shouldn't I get a medal for that or something!?!? =)

Anyways, without further ado, here is how to paint stripes on a wall! 

1.) Paint the wall one of the colors of your stripes (preferably the lighter color). We painted Isaiah's whole room grey first and then added the navy blue stripes to one wall. 

2.) Decide if you want horizontal or vertical stripes and measure the height or width of your wall. I wanted horizontal stripes so I measured the height of Isaiah's wall from top to bottom. (Make sure you don't count the baseboard!) Divide that number by the number of stripes you want. I wanted an odd number of stripes because I wanted the blue stripes to be on the top and bottom of the wall sort of "framing" the wall. I chose 7 because I wanted fairly thick stripes. 

EXAMPLE: Our walls are 93.4 inches tall, divided by 7 = 13.3 inches. That meant that each of my stripes was going to be 13.3 inches.

3.) Draw the lines for your stripes! I googled lots of different ways to draw the lines for your stripes and did what I thought sounded the easiest and most practical (and I was really happy with how it turned out!). I started at the left hand side of the wall and used a large level/ruler to mark increments of 13.3. inches all the way down the wall. Then I used the level/ruler to rule horizontal lines straight across the wall from one end to the other.
                             3a.) Make sure you have a pencil with you to mark the lines!!!! I marked each and every line on Isaiah's wall with THIS tiny piece of led:


And, before you judge =) I just have to say that I DID grab a mechanical pencil before I left our apartment in preparation for drawing these lines at the new house. And I even shook it to make sure that it had extra led in it! But when I went to use it at the new house I discovered that it was broken. And in my attempts to fix it I broke all the extra pieces of led and was left with this tiny little remnant! I searched the whole house, diaper bag, and car for another pencil.... would you believe it, not even one anywhere!!!!! When I called Drew to tell him of my dilemma he suggested I just go to the store and buy one. Such a man response! But, ummm, all THREE children were napping and I was just fixin to get 1-2 hours of uninterrupted painting time! No way was I waking the kids up from that! So I made due with what I had.... and, by God's grace, it turned out in the end (my fingers were sore though... it hurts to write with a tiny piece of led!). 

Wa-la! Can't really see them, but perfectly straight lines across the wall. 
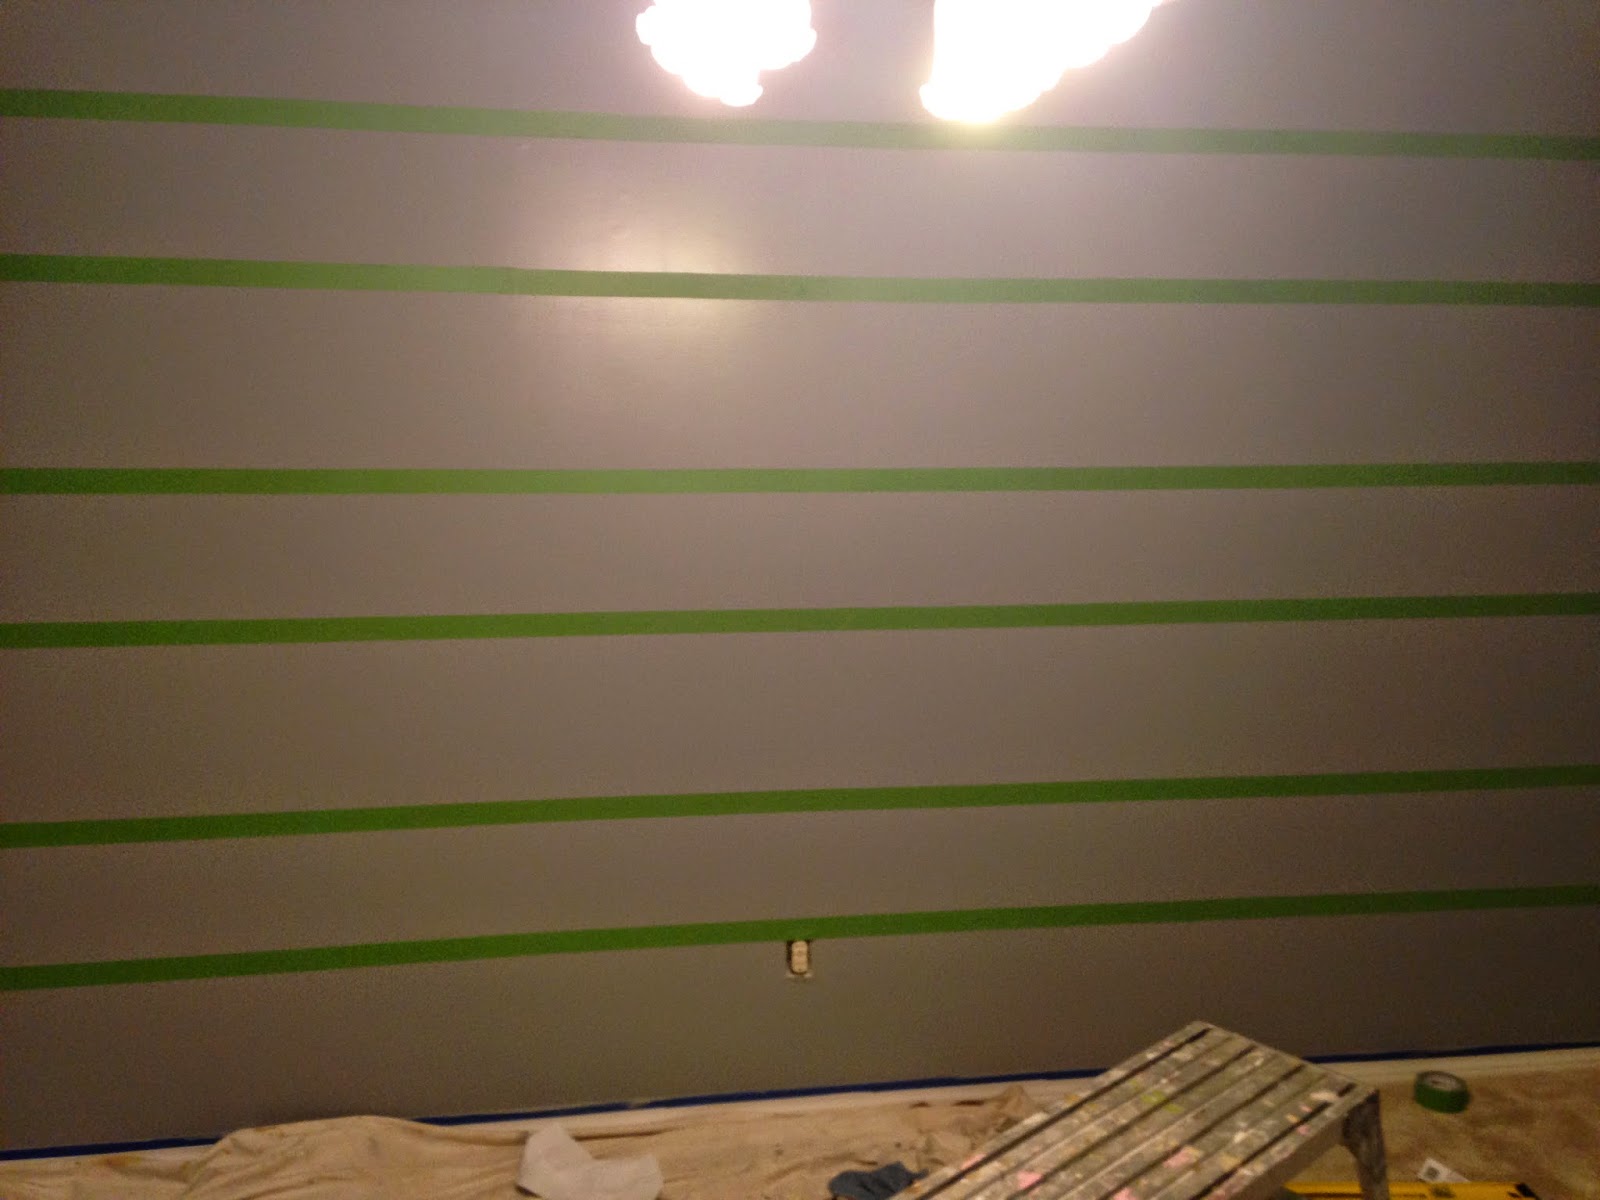
 4.) Next comes taping the stripes. Remember, when you tape, that you are taping the OUTSIDE of each stripe. It will result in some stripes looking bigger and some looking smaller but don't worry, this is how it's supposed to be for now. Check and recheck that you have taped the outside of the stripe or you will end up with uneven stripe sizes once you paint. Mark an x on the stripes that you are going to paint to make sure you paint the right ones.


5.) Next is a very important step. {DO NOT SKIP!} It's the secret to getting perfectly crisp lines! For each stripe that you plan to paint your accent color (which for us was blue), paint over the edges of the tape that mark that stripe with your base color (which for us was grey). This seals the edges of the tape and will minimize bleeding. Let this coat dry completely before you continue. 


6.) Now you can paint your fun colored stripes! The blue color that we used needed 3 coats but depending on what color or brand you use, you may be able to get away with just one. I trimmed the edges with a brush and used a small roller for the middle sections. At this point, I sent Drew (who was at work) this picture below:


To which he responded:


Oh, I do love this man who undoubtedly has the gift of encouragement!!! But, seriously, if those stripes were my finished product...... Babe, you gotta let me know the hard, honest truth. =)


 7.) Anyways, thankfully those stripes were not the end result. Step 7 leads us to the most fun (and nerve wracking) part: peeling off the tape. This is the part where you hold your, breath, say a prayer, and pull the tape! (I recommend doing this when your last coat of paint is still wet to minimize peeling some of your stripe off with the tape.) Honestly, I wasn't sure how mine were going to turn out. I was seriously thinking that we were just going to have to paint the whole wall blue and call it a day. But to my surprise, they turned out!


There were a few spots that bled and, being the perfectionist that I am, I HAD to fix them. But it was an easy fix with just a little of the base coat paint and we were good to go! 

This lighting makes Isaiah's walls look cream and blue but they are definitely grey and blue! =)

DONE! Wahooo!!!!!

And here's a little tour of Isaiah's room now that we've moved in. There are still so many plans I have in my head for this room including redoing the dresser and adding a huge firetruck canvas on the wall..... but we've gotta work on furniture for the rest of the house before we work on decorating his room, I guess. =) 

By the way, this bed sleeps 4 people (there's a trundle underneath) so COME ON VISITORS!!!!


So there you have it, folks... How to paint stripes on a wall. Until next time!
Related Posts Plugin for WordPress, Blogger...