Thursday, January 29, 2015

Quadruple Chocolate Soft Fudgy Pudding Cookies


STOP what you are doing and go and buy the ingredients to make these cookies right now!!! (Except if you are on a diet then DO NOT make these cookie..... they will ruin you for sure!)

Seriously, these cookies are a little taste of (chocolate) heaven on earth! Four different types of  chocolate in them and a cookie that bakes up bakery style soft and fluffy! I have made these cookies several times and they never last long!

I took the pictures for this post several months ago when we were still living at our apartment...but then life got busy and I didn't get around to posting them. But today, I am determined to get this post out because the world needs to learn about these cookies!!!!! Enjoy!

QUADRUPLE CHOCOLATE SOFT FUDGY PUDDING COOKIES

Yield: about 17 med/large cookies
Prep Time: 15 minutes
Cook Time: about 10 minutes
Total Time: 3+ hours, for dough chilling
INGREDIENTS:
3/4 cup unsalted butter, softened (1 1/2 sticks)
3/4 cup light brown sugar, packed
1/4 cup granulated sugar
2 large eggs
2 teaspoons vanilla extract
1 packet instant chocolate pudding mix, about 3.7 to 3.9 ounces (not sugar-free and not 'cook & serve')
1/4 cup unsweetened natural cocoa powder
2 cups all-purpose flour
1 teaspoon baking soda
pinch salt, optional and to taste
1 cup semi-sweet chocolate chips
5 ounces dark chocolate, chopped (I used a Ghiradelli 60% cocao Bar)
DIRECTIONS:
1.      Combine the butter, sugars, egg, vanilla, and beat on medium-high speed until creamed and well combined, about 4 minutes.
*My pictures reflect a double batch! (These cookies are too good for just a single batch)*
Step 1a. Get a cute little helper to help you mix!
2.      Stop, scrape down the sides of the bowl, and add the pudding mix, cocoa, and beat on low speed until just combined, about 1 minute.


3.      Stop, scrape down the sides of the bowl, and add the flour, baking soda, optional salt, and beat on low speed until just combined, about 1 minute.

4.      Stop, scrape down the sides of the bowl, and add the chocolate chips, chopped chocolate, and beat on low speed until just combined, about 30 seconds.


5.      Using a large cookie scoop or your hands form approximately 17 equal-sized mounds of dough. Roll into balls, and flatten slightly.
6.      Place mounds on a large plate or tray, cover with plasticwrap, and refrigerate for at least 2 hours, up to 5 days. Do not bake with unchilled dough because cookies will bake thinner, flatter, and be more prone to spreading.
* Note: I don't quite follow the directions at this point. I do chill the dough, but I chill it all in the bowl instead of rolling it into balls first and then trying to find trays or containers large enough for them all to sit in while in the fridge. Ain't nobody got time for that! And my cookies still turn out great! *
7.      Preheat oven to 350F,  spray a baking sheet with cooking spray. Place dough mounds on baking sheet, spaced at least 2 inches apart and bake for about 10 minutes. Don't overbake which is easy to do with dark cookies. Cookies firm up as they cool. Allow cookies to cool on baking sheet for about 10 minutes before serving.

8.      Cookies will keep airtight at room temperature for up to 1 week or in the freezer for up to 6 months. Alternatively, unbaked cookie dough can be stored in an airtight container in the refrigerator for up to 5 days, so consider baking only as many cookies as desired and save the remaining dough to be baked in the future when desired.

Thursday, January 22, 2015

How to Paint Stripes on a Wall

When we first started the process of buying our house we had decided that we weren't going to paint the walls before we moved in. Since our house had been newly remodeled before we bought it, the walls had no nail holes and were all painted a nice neutral color. Not only is paint (and all the supplies) expensive, but it's also time consuming to paint (and Drew had final exams two days before we moved in so we didn't have a whole lot of extra time to spare!).

But... then we (and in we I mean "I") started getting a little sentimental (and practical) and realized that 1.) it's a tooooooon easier to paint bedroom walls {before} you move in, especially when you have three young children you'd have to bounce around if you wanted to paint at a later date, and 2.) this is the first time we've ever owned a home and had the ability to do WHATEVER we want with it! We'd never been able to choose paint colors and this was our chance!

So, with an awesome deal on paint at Lowes and some borrowed paint supplies we decided to go ahead and paint the bedrooms and play room before our move! We left the main living areas as is for now but those will be easier to paint at a later date if we decide we want to, and they are a neutral beige/grey color now which I really don't mind at all. 

We got a good deal on the paint and borrowed supplies but that still left us with the problem of time. Drew still didn't have a whole lot of time to spare and although he and his dad did end up doing a good amount of painting, I spent many days over at the new house painting by myself (and by myself I mean alone WITH ALL THE KIDS). But, what can I say? I'm pretty determined when I get my mind set on something and I had my mind set on STRIPES in Isaiah's room. So, stripes it was! It took three days, numerous numerous interruptions, and (I admit) a little bit of yelling, but I did indeed accomplish the task of painting stripes on a wall with three children 4 and under in a house with no internet, no cable, no beds for naps, few toys, and barely any food. Shouldn't I get a medal for that or something!?!? =)

Anyways, without further ado, here is how to paint stripes on a wall! 

1.) Paint the wall one of the colors of your stripes (preferably the lighter color). We painted Isaiah's whole room grey first and then added the navy blue stripes to one wall. 

2.) Decide if you want horizontal or vertical stripes and measure the height or width of your wall. I wanted horizontal stripes so I measured the height of Isaiah's wall from top to bottom. (Make sure you don't count the baseboard!) Divide that number by the number of stripes you want. I wanted an odd number of stripes because I wanted the blue stripes to be on the top and bottom of the wall sort of "framing" the wall. I chose 7 because I wanted fairly thick stripes. 

EXAMPLE: Our walls are 93.4 inches tall, divided by 7 = 13.3 inches. That meant that each of my stripes was going to be 13.3 inches.

3.) Draw the lines for your stripes! I googled lots of different ways to draw the lines for your stripes and did what I thought sounded the easiest and most practical (and I was really happy with how it turned out!). I started at the left hand side of the wall and used a large level/ruler to mark increments of 13.3. inches all the way down the wall. Then I used the level/ruler to rule horizontal lines straight across the wall from one end to the other.
                             3a.) Make sure you have a pencil with you to mark the lines!!!! I marked each and every line on Isaiah's wall with THIS tiny piece of led:


And, before you judge =) I just have to say that I DID grab a mechanical pencil before I left our apartment in preparation for drawing these lines at the new house. And I even shook it to make sure that it had extra led in it! But when I went to use it at the new house I discovered that it was broken. And in my attempts to fix it I broke all the extra pieces of led and was left with this tiny little remnant! I searched the whole house, diaper bag, and car for another pencil.... would you believe it, not even one anywhere!!!!! When I called Drew to tell him of my dilemma he suggested I just go to the store and buy one. Such a man response! But, ummm, all THREE children were napping and I was just fixin to get 1-2 hours of uninterrupted painting time! No way was I waking the kids up from that! So I made due with what I had.... and, by God's grace, it turned out in the end (my fingers were sore though... it hurts to write with a tiny piece of led!). 

Wa-la! Can't really see them, but perfectly straight lines across the wall. 
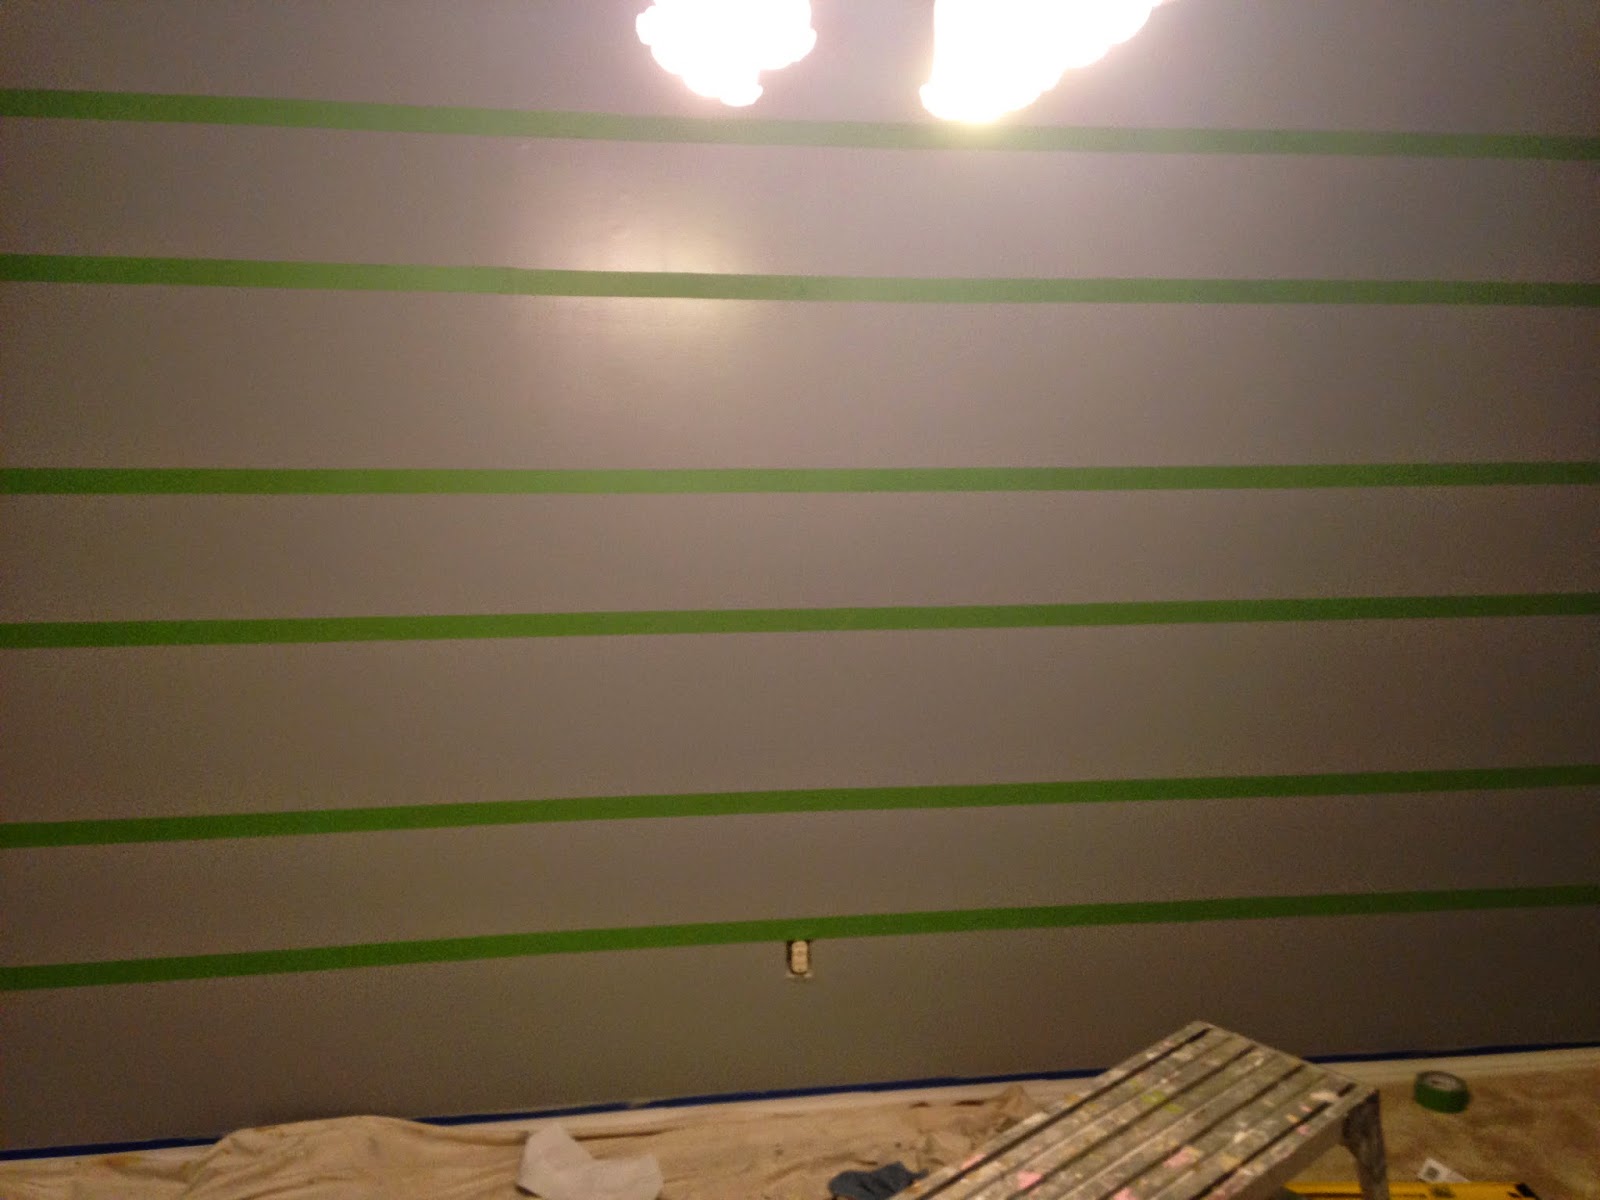
 4.) Next comes taping the stripes. Remember, when you tape, that you are taping the OUTSIDE of each stripe. It will result in some stripes looking bigger and some looking smaller but don't worry, this is how it's supposed to be for now. Check and recheck that you have taped the outside of the stripe or you will end up with uneven stripe sizes once you paint. Mark an x on the stripes that you are going to paint to make sure you paint the right ones.


5.) Next is a very important step. {DO NOT SKIP!} It's the secret to getting perfectly crisp lines! For each stripe that you plan to paint your accent color (which for us was blue), paint over the edges of the tape that mark that stripe with your base color (which for us was grey). This seals the edges of the tape and will minimize bleeding. Let this coat dry completely before you continue. 


6.) Now you can paint your fun colored stripes! The blue color that we used needed 3 coats but depending on what color or brand you use, you may be able to get away with just one. I trimmed the edges with a brush and used a small roller for the middle sections. At this point, I sent Drew (who was at work) this picture below:


To which he responded:


Oh, I do love this man who undoubtedly has the gift of encouragement!!! But, seriously, if those stripes were my finished product...... Babe, you gotta let me know the hard, honest truth. =)


 7.) Anyways, thankfully those stripes were not the end result. Step 7 leads us to the most fun (and nerve wracking) part: peeling off the tape. This is the part where you hold your, breath, say a prayer, and pull the tape! (I recommend doing this when your last coat of paint is still wet to minimize peeling some of your stripe off with the tape.) Honestly, I wasn't sure how mine were going to turn out. I was seriously thinking that we were just going to have to paint the whole wall blue and call it a day. But to my surprise, they turned out!


There were a few spots that bled and, being the perfectionist that I am, I HAD to fix them. But it was an easy fix with just a little of the base coat paint and we were good to go! 

This lighting makes Isaiah's walls look cream and blue but they are definitely grey and blue! =)

DONE! Wahooo!!!!!

And here's a little tour of Isaiah's room now that we've moved in. There are still so many plans I have in my head for this room including redoing the dresser and adding a huge firetruck canvas on the wall..... but we've gotta work on furniture for the rest of the house before we work on decorating his room, I guess. =) 

By the way, this bed sleeps 4 people (there's a trundle underneath) so COME ON VISITORS!!!!


So there you have it, folks... How to paint stripes on a wall. Until next time!

Monday, January 5, 2015

Christmas 2014

Alright, so here's some pictures from Christmas 2014. Better late than never, right? We moved into our new house on December 14 and then my parents came a week later to spend the holidays with us so it's been busy over here! But I'm trying hard to catch up on posts (starting with my Christmas post) and have several more in the works (including a house tour!).

Poor Olive.... or is it poor Santa!? =)
We had a great Christmas this year! Simple, but good. We decided to go small on presents. It's so easy to get caught up in thinking we need to buy so much (especially for our kids). But with the budget stretched especially thin with having just bought and moved into a new house we couldn't spend alot this year. That's ok, though, because presents are not the reason we celebrate Christmas. We celebrate because Jesus was born to save us from our sins. We celebrate to spend quality time with friends and family. We celebrate to remember what an awesome gift we've been given through Christ!

My three Christmas cuties!
The kids and their cousin, Gavin. 
Christmas Eve!
As per Hutcheson tradition, the kids get to open their stockings on Christmas Eve. =) 


On Christmas Eve we went to see some amazing lights in a nearby neighborhood with my parents and sisters. It was alot of fun!
Oh my!!! Look at that pout when she wanted to open a gift Christmas morning but it wasn't her turn yet! Lol!
Ironically the pout disappeared when she opened her present. =)
Isaiah wrapped up a picture of himself as a baby, then gifted it to himself, then opened it up saying, "Oh!!! A picture of me as a baby, how cute mom. Look at me, I was so cute". We were cracking up!
You can always count on Drew to make an amazing face on Christmas morning. =)
Like I said, we totally went all out this year on presents.... my husband got me cheese popcorn!!!
A gift for Meema. 
New gloves for Papa (can you tell he doesn't live in Florida?)
A gift for Janae!
I think Meema liked her gift! (A bird feeder)
Isaiah wrapped up a gift for Eloise - some of her own old toys. =) And then he opened it for her on Christmas morning. Lol!
One of Isaiah's favorite gifts - A Nerf Gun from Meema and Papa. Isaiah could not understand how in the world Meema and Papa knew what he wanted most for Christmas! ;) 
Adelynn got body spray!


Pacis and sippie cups for baby Livy!
That little pony tail!! <3
Olive got her first baby doll!
Another of Isaiah's favorite gifts!
Opening up gifts at Mimi and Grandpa's house!


It was a wonderful Christmas and we all got more than we needed! We were so blessed to be able to spend lots of time with my parents and little sisters as well as Drew's family. Thank you, Jesus, for coming as a tiny baby to save us from our sins. We are so unworthy and yet so grateful. Merry (late) Christmas!
Related Posts Plugin for WordPress, Blogger...